


Small Home Gazette, Fall 2016
Choosing Your Stencil
Arts & Crafts Stenciling: Part 2
 Maybe Part 1 of this series (in the Summer 2016 issue of the Small Home Gazette) on stenciling enticed you a bit. Maybe finding out how homes from the Arts & Crafts movement were originally adorned with this practical, charming decorative art has the little hamster wheel in your head wildly spinning with ways you can spice up your abode. But different styles of Arts & Crafts stencil designs can be better suited to certain applications than others. In this article, I’ll present a few options to help you choose the best design for your project.
What exactly is a stencil? A stencil is a pattern or design that is cut out of a material such as plastic or heavy paper stock. This is then called a stencil plate. When paint is applied on top of the stencil plate, the color is transferred only through the openings, re-creating the design on the chosen surface, such as a wall or piece of fabric. Most of the stencils today are laser cut from clear plastic that is 5 to 7 millimeters thick. Plastic is more durable than the originally-used varnish-coated, heavy paper stock and more flexible than the early metal types. It is also easy to see through, which makes aligning the design simpler.
One way to create a stencil is by cutting the entire design out of one plate or overlay. By using a separate brush for each color, all the colors used in the design are applied before moving the plate to the next location.
“Multiple overlays” means several plates are used to create the design, with each plate used for a separate color. You need to align each plate on top of the previously stenciled image, which can be tricky and is definitely time consuming. Arts & Crafts period stencils used both single and multiple overlays. Call me lazy, but I like working with single overlay stencils. I find them faster and easier to effortlessly blend colors, so you will find most of the stencils from Trimbelle River Studio & Design to be single overlays.
Types of Designs
There were also many types of designs. For instance, borders could have consisted of Chain Link, Beading, Background, or Dominant stencils. There were Spot and Panel designs and the magnificent Outline. Here is a brief breakdown to help you understand the differences.
Chain Link designs have the same image repeated over and over like links in a chain.
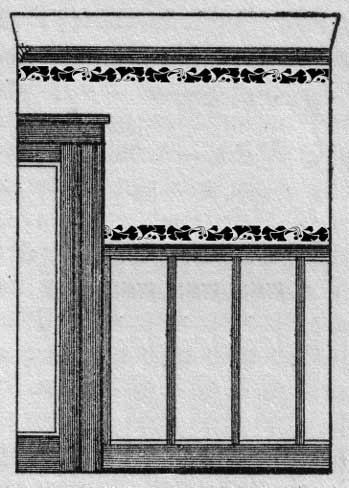
This Chain Link design would work well below crown molding, above a plate rail, or both.
Beading is a type of Chain Link design often used with a matching corner piece to go around windows and doors.
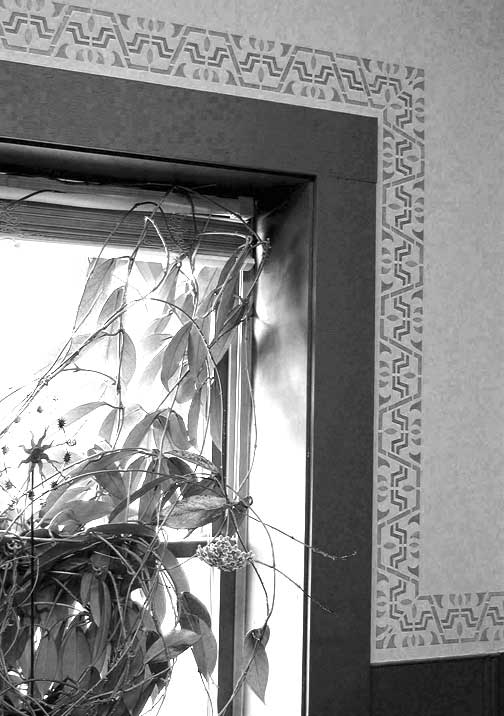
An example of a Beading design.
Background stencils, another form of Chain Link, have the background of the design cut out and stenciled, similar to reverse stenciling with the surface color underneath actually creating the design. The usual application is only one color. These designs work well with iridescent paints on darker walls.
Background stencils were often applied in a single color.
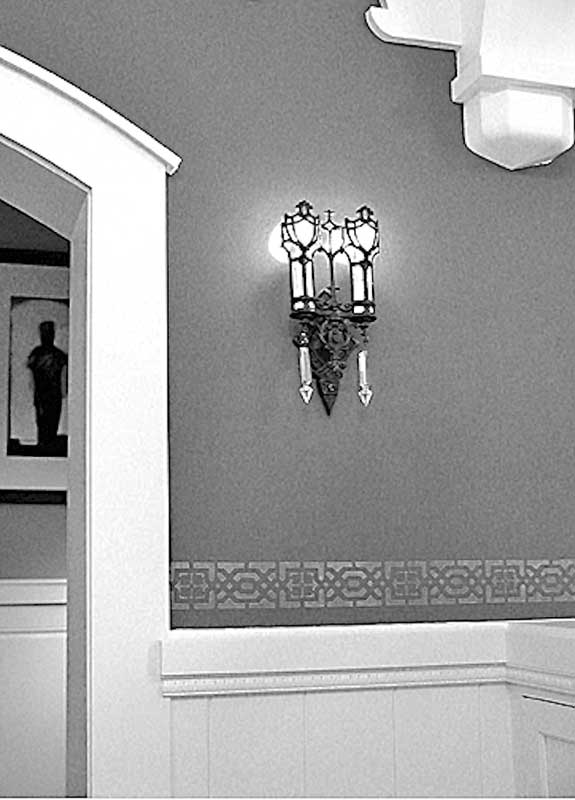
Here the Background design is applied in iridescent gold on a dark cranberry wall.
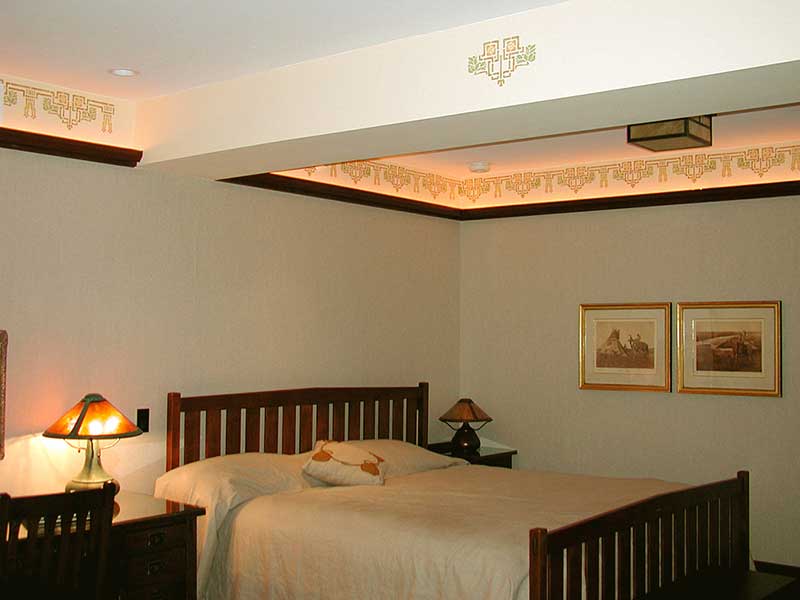
Dominant stencils were very popular period designs. Consisting of a dominant image (such as a pendant) connected by a less significant image (usually a type of bar pattern that could be altered to fit the space between the dominant images), these designs were quite adaptable.
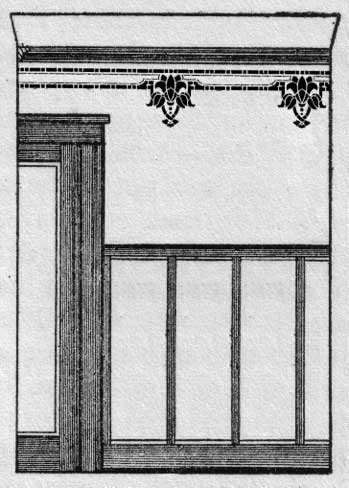
In this image, you can see how the bar is easily stretched to run above the door where space is limited for the full pendant image and also in between the pendants to help center the pendants on the battens in paneling.

An example of a Dominant stencil.
Spot designs are just that—a spot of design. They can be used in a variety of ways, by themselves or repeated over and over to form a pattern.
Note how a portion of the stencil border is used as a spot of stencil on the center beam. (Rose & Bellflower design in bedroom of Hotel Pattee, Iowa.)
Panel designs, like Spot stencils, were often used as a spot of design in the panels of a cabinet, screen or wainscot. Like Dominant stencils, the Panel was designed for adaptability. Again, by using a simple image like bars in the middle portion of the Panel design, the height of the image was easy to adjust.

Note how easy it was to adapt the height of this Panel stencil. (Panel Lily design)
And then there was the glorious Outline stencil, mainly used by professionals. With this design type, only the outline of the design was stenciled and then it was hand painted with glazes, kind of like a coloring book. I will elaborate more on this magnificent example in another article.
How to Choose
Although size does matter when it comes to choosing a stencil, you can make almost any design work for your particular needs. Larger wall spaces, darker rooms, and higher ceilings allow the use of stronger designs and colors. Smaller panels or walls, lighter rooms, and lower ceilings generally do better with smaller or simpler designs and softer hues.
Placement of the design will help dictate size as well. A small design that could get lost along the ceiling might work well running at eye level above the tile in the bathroom. A large design that might be dominating around a small room could be perfect along the bottom of curtains or portieres. The old rule of thumb is that if you plan on filling a frieze* area with a stencil, the design should be between 3 to 5 inches smaller in height than the frieze. But frieze areas can vary widely and so a smaller design may work better to accent the crown molding or picture rail.
 If one design really, really grabs you and you just don’t think you could live without it, consider your options as to where to use it and how intense to make the colors. Chances are you will be able to make it work one way or another.
*A decorative horizontal band, as along the upper part of a wall in a room.
Watch for additional articles in this stenciling series in future issues of the Small Home Gazette.
Amy Miller, a member of the Twin Cities Bungalow Club, works passionately towards preserving and promoting the art of stenciling. She is the founder of Trimble River Studio & Design (www.trimbelleriver.com), specializing in vintage stenciling from the Arts & Crafts movement, and she is the author of the book Stenciling the Arts & Crafts Home.