


Small Home Gazette, Fall 2022
Answers to Your Toughest Bungalow Questions: cove molding replacement
A: Yes, bungalows typically have a picture rail, though it is usually paired with a cove, or crown, molding so that from below they appear to be a single five- or six-inch-high piece of woodwork. There is a small gap between the two, however, so that a picture hook can be hung over the rail.

The crown molding in bungalow living and dining rooms is often made up of two sections. Note the slight gap between the upper piece and lower picture rail, which is not visible from a typical viewing perspective.
Less commonly, the picture rail is positioned several inches below the cove molding. Even more rare is the use of only the slender picture rail. Bedrooms, however, commonly have only the rail (no cove molding), and it was typically painted.
Like the rest of the woodwork in Twin Cities bungalow living and dining rooms, the crown molding/picture rail unit is visually heavy—dark oak five or six inches high. Strong woodwork was used to balance the richly colored (or papered) walls and boldly patterned rugs popular during the Arts & Crafts era. In the late 1920s, the rail molding in the living and dining rooms was sometimes reduced in overall size and eventually eliminated in the 1930s.
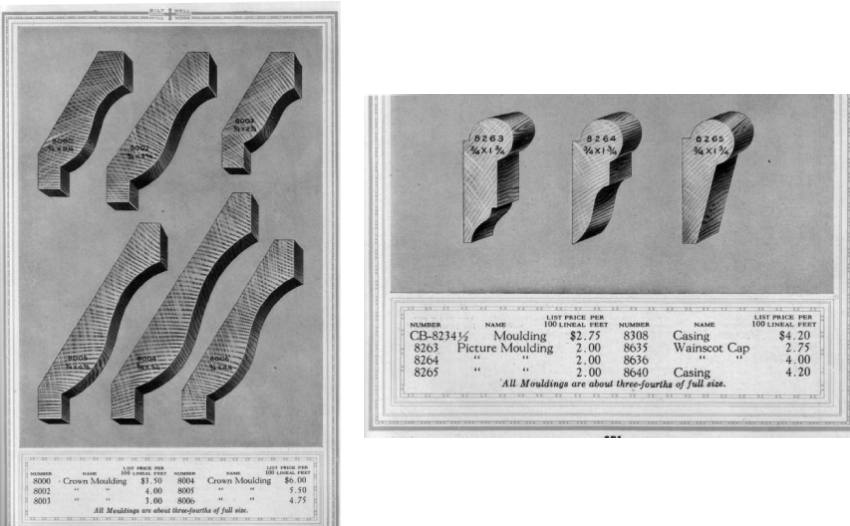
A combination of cove, or crown molding, left, and picture molding, right, is often found in bungalow living and dining rooms. Illustrations are from a 1919 Minneapolis millwork catalog.
If your cove molding is in good shape other than being painted, we would strongly recommend stripping and refinishing rather than replacing it. The original molding was likely made from old-growth wood that is nearly impossible to find anymore and was usually selected for its decorative grain pattern. We always advocate saving original elements of old houses. If you have only the cove molding, you can add the slender picture rail underneath. Such trim pieces can still be found at some lumberyards and salvage yards.
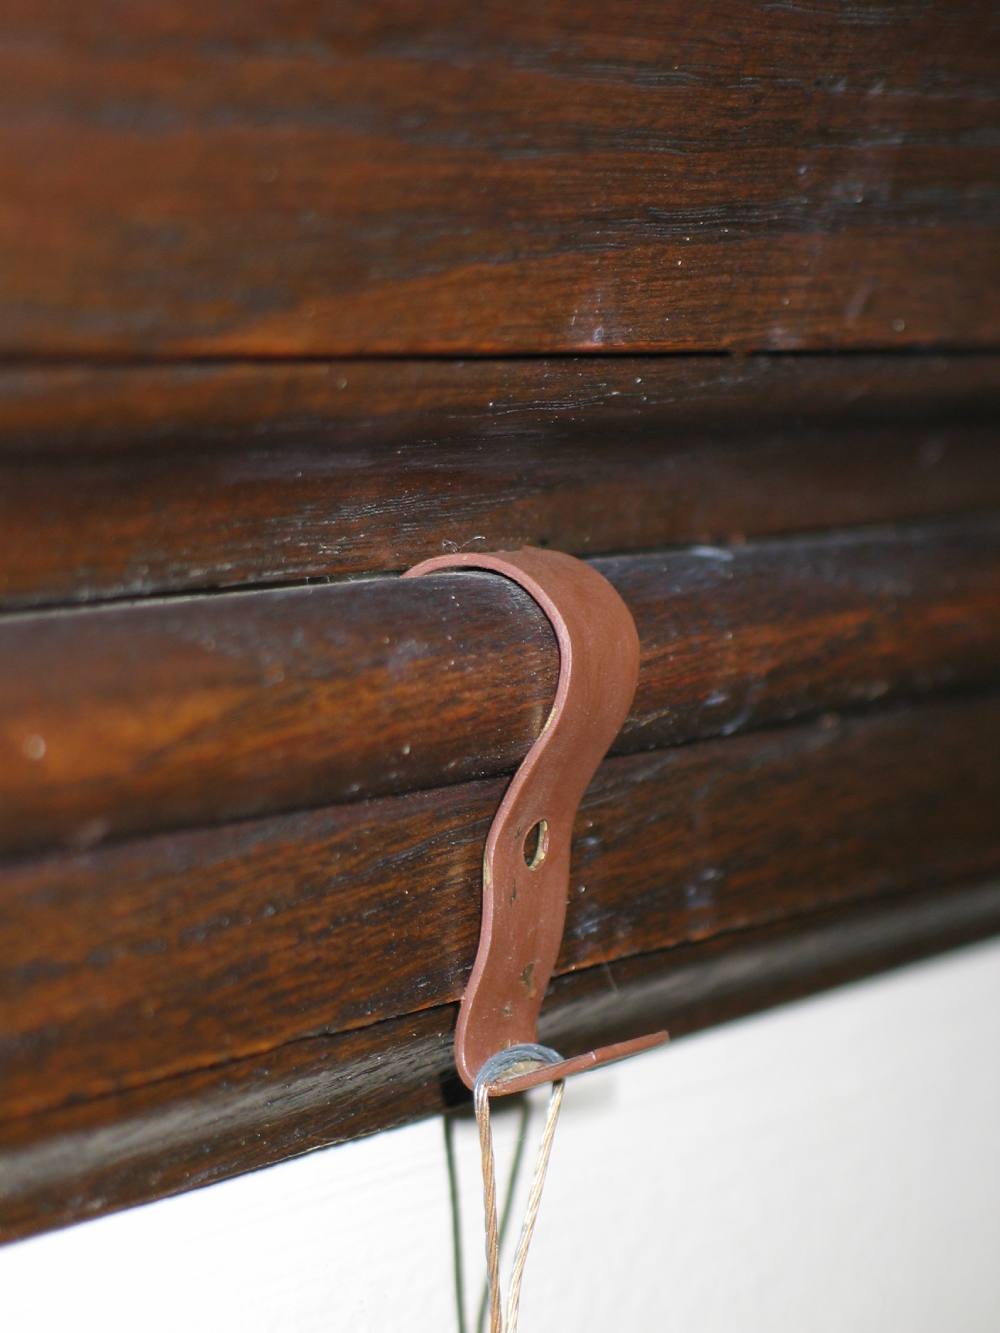
A picture hook hangs on the picture molding. These hooks are available at hardware stores and framing shops.
Hanging your artwork from picture rails has many advantages over standard methods. The first is obvious—you will not make holes in your walls by pounding nails into them. In addition, artwork can be repositioned easily. The hooks can be moved side-to-side along the rail, and shortening or lengthening the hanging wire adjusts the frame height.
Avoid using two separate wires on each picture. Instead, thread a single wire through eyelets on either side of the back of the frame, and attach the wire ends to the hooks, which hang on the rail. This also makes leveling the object extremely easy.
Use standard picture wire, available at hardware stores and framing shops. Picture rail hooks are also readily available. The silver color of the exposed wire can be distracting, so use a petroleum-based paint pen (available at hardware and crafts stores) in a bronze or gold color to coat it once the picture is in place.
Artwork should be hung so that the top third of the object is at eye level, though that level is admittedly subjective. If the object will be viewed primarily from a sitting position, hang it even lower. Think of hanging artwork as part of a grouping that might include furniture, lamps, pottery or metalwork.