Small Home Gazette, Spring 2017
Stenciling Fabrics
Arts & Crafts Stenciling: Part 4
 I always get a kick out of watching people’s faces when I say they can stencil on fabrics as well as their walls. It’s as if I just told them I have a cat that can do tricks. They need time to consider this. (After all, everyone knows that cats only do what they want when they want.) Then I show them various forms of stenciled fabrics, and their eyes light up as their imaginations crank into high gear.
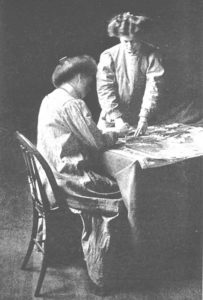
The truth is that fabrics were widely stenciled during the Arts & Crafts movement. Magazines like The Craftsman, Ladies Home Journal, and House Beautiful encouraged homeowners to create their own decorative arts for their homes.
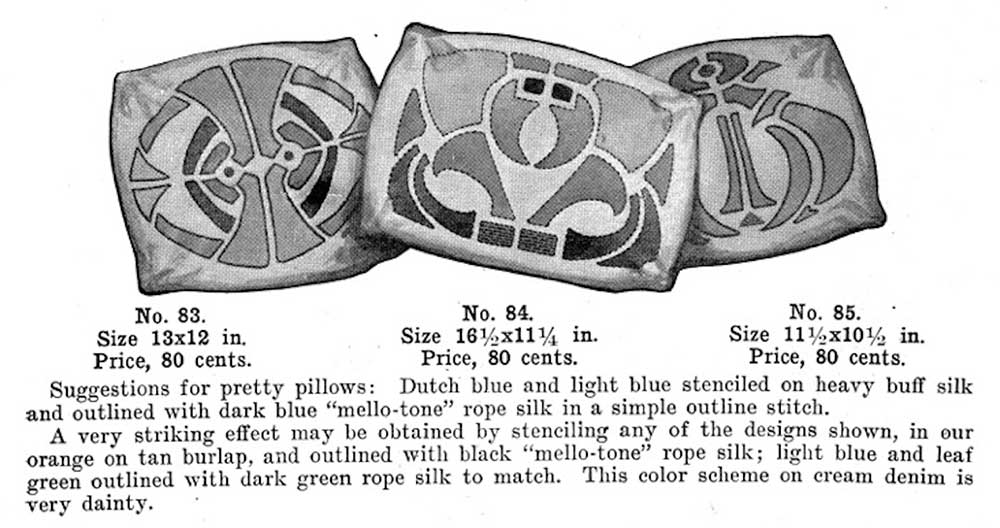
Stenciling was a wonderful way for them to do this, and textiles were often a simple, first-time project with easy layouts and fast end results. Table linens, pillows and curtains as well as more “womanly” items such as pincushions and aprons were viable options.
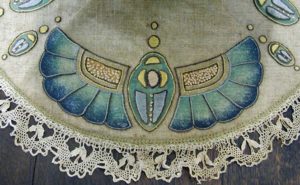
Linen was a popular choice, but many other textiles were also stenciled. Heavier velvets and coarser fabrics like burlap or canvas (as well as more delicate fabrics like silks and sheers) were used, depending on the project. Quick, easy projects (or a way to feed their addiction once the stenciling bug got them)—the use of fabrics was definitely a part of stenciling throughout the beloved bungalow era.
Homeowners could purchase a single, precut stencil or a complete mail order kit that included stencils, paints and brushes. They could cut their own stencil, choosing a pattern from one of the current magazines or create their own. After the stenciling was completed, it was often embellished with embroidery. A simple stem stitch could have outlined a stenciled leaf or more complicated stitches could have been used to enhance the design. It depended on what the homeowner wanted or was capable of. Stenciling and embroidery often went hand-in-hand.
Stenciling textiles is still a great option for current bungalow owners, and many washable fabrics work beautifully, but it is a bit different than stenciling paper or drywall. Here are a few tips to get you started.
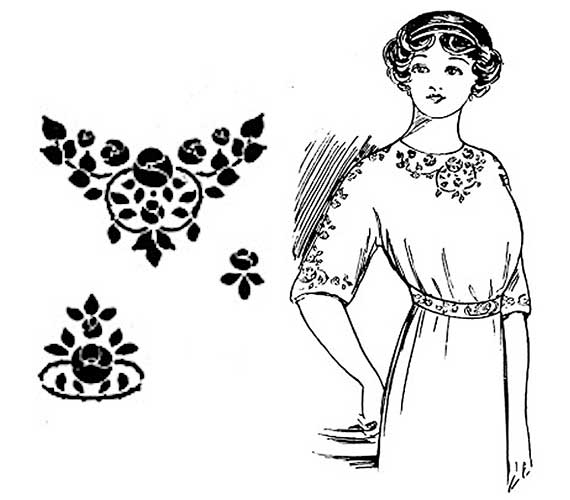
Dress with stenciled yoke and cuff. Sprigs form a line from neck to elbow and are also on the waistband and part of the cuff.
• Choose a material with a fairly tight weave and without a nubby or heavy texture for best results. If you are using an oil-based medium like the Shiva Paintstik® paints used in my workshops, make sure your fabric is washable because dry cleaning solvents can remove the oil paints. Wools contain natural oils that can prevent the paint from adhering, and water-repellent fabrics are likely to repel the paint as well. Fabrics with a heavy nap like velvet or those that are extremely shifty like chiffon are not good choices for first time projects, but both materials are quite spectacular when stenciled.
• The first thing to do before stenciling a textile is to wash the fabric to allow for shrinkage and to remove any sizing or treatments applied to it. Skip fabric softener, bleach or starch as they can inhibit paint adhesion. Press after washing so the material will lay flat during stenciling.
• Practice your stencil on paper; then practice on a scrap of the same fabric to become familiar with how the paints and application process differ on fabric before starting your final project. If you have purchased pre-made curtains or runners, take a sample to your local fabric store in hopes of finding a similar fabric to practice on. You will need a quarter of a yard.
• I highly recommend using a repositionable stencil adhesive when working on fabrics. Use of an adhesive allows the stencil plate to adhere to the surface of the fabric; prevents the slippery plastic stencil from sliding all over the place; and doesn’t leave a residue. Spray the back of the stencil plate with the repositionable adhesive and allow to dry; then position the stencil on top of the fabric.
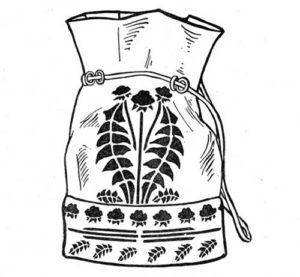
“An effective arrangement of the dandelion on laundry bag of toweling. Sunflower yellow and dark green for decoration.”
• Personally, I like using the solid, oil-based paints, like the Shiva Paintstiks®. Because they are oil-based, they dry to a soft, flexible finish and are permanent and washable when heat-set, a simple technique you do with an iron. (You can find heat-setting instructions in my book, Stenciling the Arts & Crafts Home, or on my website, www.trimbelleriver.com). Water-based textile paints are commonly used today and are certainly an option, but I find they are not as easy to work with, nor do they provide the same beautiful effects as the originally used oil-based paints. Frankly, I do not care for the crispy, stiff feeling that dried acrylics leave on fabric, but both mediums will work and both usually require heat-setting.
An important thing to remember when working with fabrics is to keep the work area clean, especially your hands. Removing an undesired fingerprint from your beautiful table runner can be quite a challenge. It is simply better to not allow it to get there in the first place. But don’t let the fear of a fingerprint keep you from attempting a fabric project. Like everything else, practice and preparation will bring confidence, and before you know it, you’ll be starting in on kitty tricks.
Watch for additional articles in this stenciling series in future issues of the Small Home Gazette.
Amy Miller, a member of the Twin Cities Bungalow Club, works passionately towards preserving and promoting the art of stenciling. She is the founder of Trimble River Studio & Design (www.trimbelleriver.com), specializing in vintage stenciling from the Arts & Crafts movement, and she is the author of the book Stenciling the Arts & Crafts Home.


