


Small Home Gazette, Spring 2021
A Copper Window Box Liner
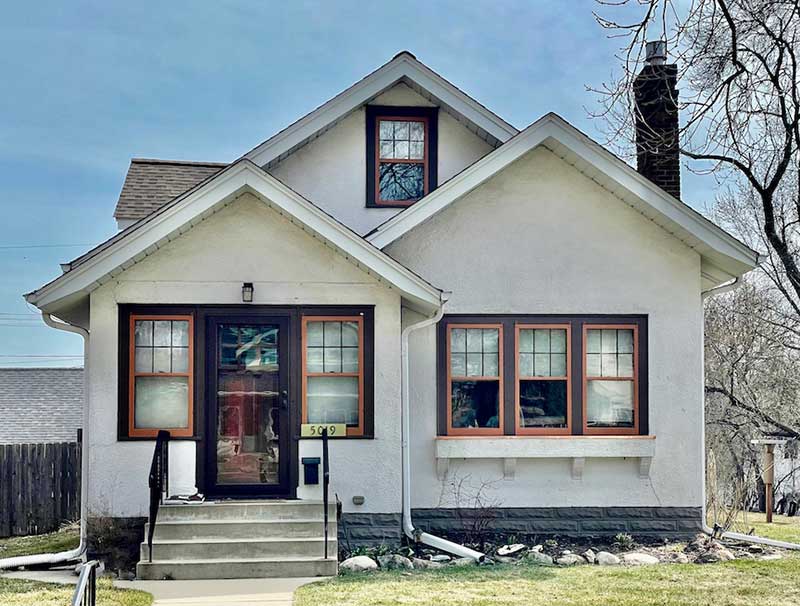
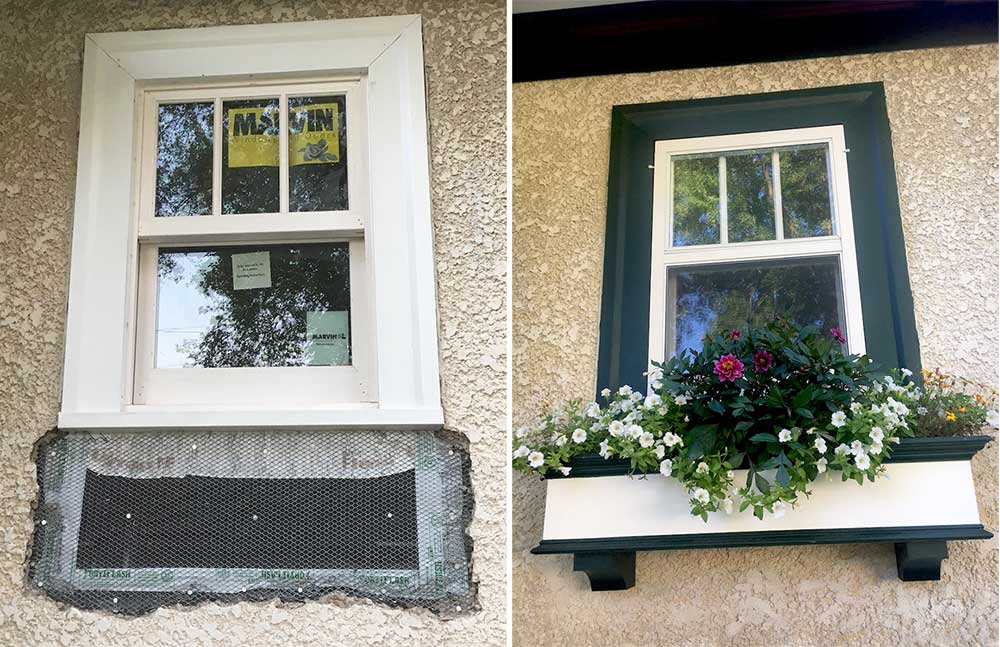
Window box on the front of Char Ryan’s bungalow.
We received an email from Bungalow Club member Char Ryan in September of 2020, in which she asked whether we knew of local businesses that made replacement metal liners for stucco window boxes. Fortunately, we did.
In 2008, I had my bungalow’s stucco window box entirely removed and rebuilt. I wrote an article about the experience that ran in the Fall 2008 issue of this newsletter. I included the names of two local companies that can fabricate custom liners to fit existing window boxes (see Resources). We forwarded this information to Ryan, and she reached out to Bloomington-based Architectural Sheet Metal.
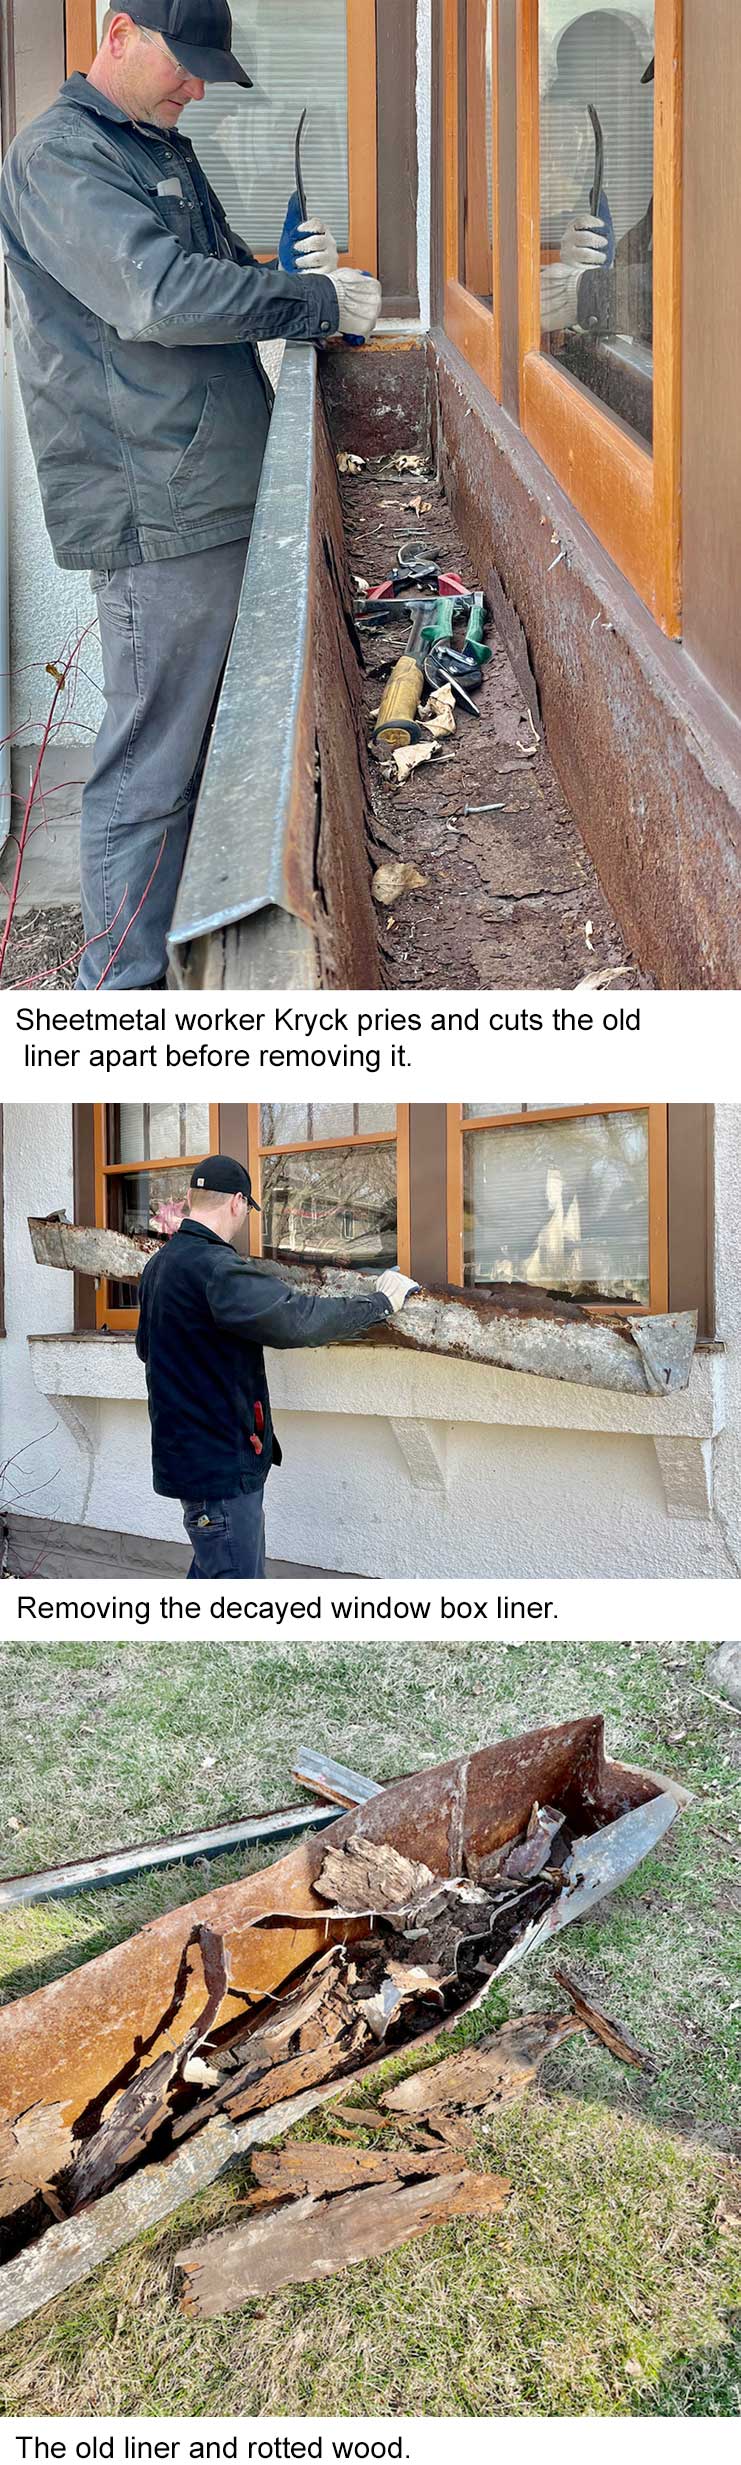
On a fresh morning in early April of this year, a specialist from Architectural Sheet Metal arrived at Ryan’s south Minneapolis bungalow to remove the old window box liner and install a new copper liner. I invited myself over to watch the procedure and take photographs.
 Ryan noticed long ago that the box’s galvanized steel liner—presumably installed when her home was built in 1924—was rusting away. Galvanizing steel or iron by bonding a layer of zinc to its surface is a time-honored, economical method of protecting the base metal. Zinc coating can last up to 50 years, but it eventually wears away and the base metal rusts. In window boxes, this means water penetrates the liner and seeps into its wood frame, as well as into the interior of the home’s wall, causing all manner of problems.
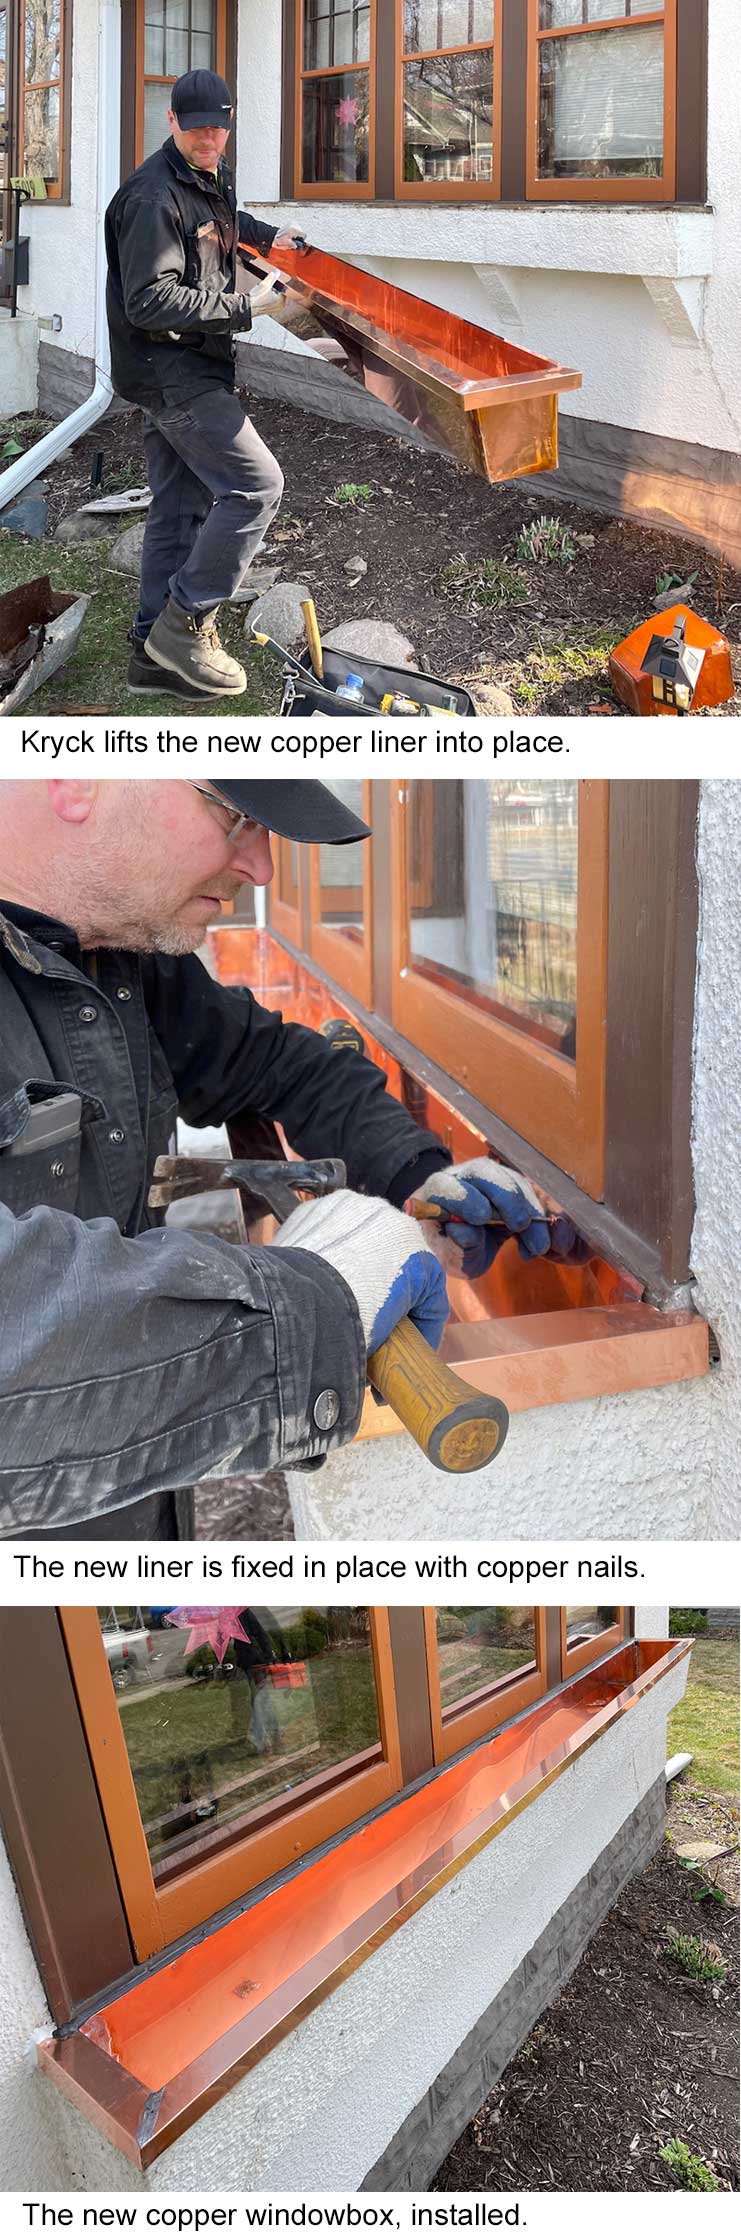
Ryan opted to have her new window box liner built of copper instead of galvanized steel. When I arrived and saw the copper liner resting on her front lawn, I was struck by the metal’s sheer beauty. The surface was bright and shiny, almost mirror-like, gleaming in the sun. Of course, that gleam will not last long. Ryan Kryck, the installer, explained that it would darken to a bronze patina in about a year. After that, it would slowly acquire the verdigris (bluish-green) color that aged copper is known for. Verdigris is valued for more than its aesthetics—the patina also protects the metal and extends its life. Exterior copper house trim can last a century or more.
I asked Ryan about the cost premium of copper over galvanized steel. She told me that when she contacted Architectural Sheet Metal, they gave her a price of $2,105 for galvanized steel and $2,309 for copper, including installation.
Kryck turned from his task and explained that the price difference is not always that close. “The price of steel is pretty stable,” he said. “The price of copper, though, can vary a lot. It just depends on what the market is when you order.”
Kryck said that his company installs 10 to 12 replacement window box liners each year, and most of them are copper.
Kryck removed nails holding the old window box liner in place and cut away sections of its rim to free it from the stucco frame. The majority of the liner could then be lifted out in one piece, though it was immediately clear that a significant portion of it had rusted away. He scraped out what was left of the window box’s wood frame—and there was not much left. Decades of rot had reduced the boards to lightweight cellulose ghosts of their former selves, which crumbled to the touch.
 Fortunately, the steel mesh lath that had been attached to the boards when the box was built was still intact, thanks to stucco that had been pressed into it. This meant the box was still structurally solid even without its original wood frame. (Think of papier-mâché applied over a balloon, then the balloon is removed after the shell has dried.) Stucco siding—at least the way it was used to build many of our bungalows—is truly an amazing material. It is about as close to maintenance-free as siding can get.
With the old liner out, Kryck used sheet metal shears to snip out bits of the new liner’s rim at either end to fit around window trim. He said he always brings plenty of tools to customize the final details on-site. Once set in place, he used copper nails to anchor the insert. He then drilled two drain holes in the bottom of the pan in the location of the original pan’s drains, so that they lined up with openings in the stucco underside of the window box. Copper pipe segments were soldered into the holes, extending down through the openings beneath. The final touch was to solder squares of copper mesh over the holes to help prevent dirt from clogging the drains.
Open-Bottom Window Box
Ryan was fortunate that the stucco shell of her window box was still structurally sound. I was not so lucky back in 2008. Not only had the steel liner and wood frame of my box rotted away, the stucco shell had multiple fractures and missing chunks. The whole thing had to be removed and rebuilt. (See Resources.)
This gave me the opportunity to rethink the window box’s design. I have heard it said moisture is the root of all old-house problems, and that is certainly true of window boxes. Filled with soil year round, they continually hold some degree of moisture. Not only does moisture corrode the metal liner and rot the wood frame, but winter freezing causes expansion of the soil, which, over time, can crack the stucco shell.
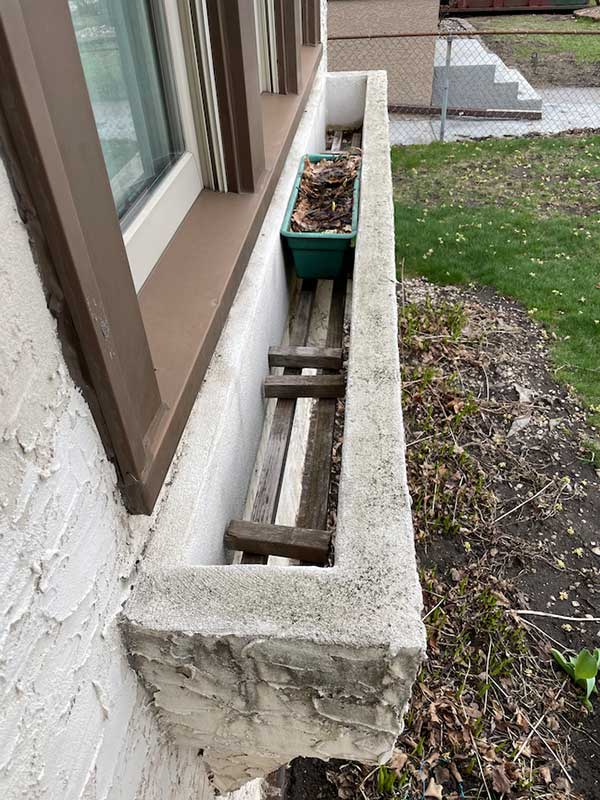
When Tim Counts had his window box rebuilt, he opted to eliminate the bottom so that it would not retain water. Cedar 2-by-2-inch boards were laid across the stucco braces to support rectangular plastic planters, which are removed for winter.
An idea came to me: Why not plant the flowers in rectangular planters that could be set inside the window box during the growing season, then removed in winter? And why not rebuild the box without a bottom, so that excess water draining from the planter boxes simply falls to the ground?
I presented this concept to my contractor. At first they were hesitant to vary from the traditional window box design. They had always faithfully reproduced what they removed, right down to the metal liner with drain holes. Frankly, I was not entirely confident of my untested plan either. But the contractors thought about it; discussed it with other tradesmen; and ultimately decided the design made sense. In fact, they said they planned to offer the bottomless box to other customers as an option.
Now, 13 years later, I am very happy with the open-bottom design. It works exactly as we thought it would.
Bolt-on Window Box
A kitchen remodel precipitated Bungalow Club board member Deb McKinley’s desire for a small window box on the back of her bungalow. A window was repositioned to rectify a problem created by a previous owner’s kitchen remodel, resulting in an exterior stucco patch. Knowing new stucco takes years to blend in, if it ever does, McKinley wanted to conceal the patch.
She found a compact box made of PVC online (see Resources). It is attached to the house by a couple of beefy lag bolts that go through the stucco siding and into internal wall studs. McKinley sees several key benefits of this type of box: PVC is rot proof and can easily be painted; it has drainage holes to prevent dampness from being held against the house; and, unlike larger, structurally integrated window boxes, it can be temporarily removed if necessary.
Resources
Architectural Sheet Metal
941 W. 80th St., Bloomington, MN
952-881-2241
lesjonesroofing.com/portfolio-page/architectural-sheet-metal
PVC Window Boxes
211 Hogan Pond Lane, Ball Ground, GA
888-505-7715
flowerwindowboxes.com
“Rebuilding a Stucco Window Box”
Small Home Gazette, Fall 2008
Sheridan Sheet Metal
4108 Quebec Ave. N., New Hope, MN
763-537-3686
sheridansheetmetal.com