


Small Home Gazette, Summer 2017
What Water Hath Wrought
Editor note: Click on each image to enlarge it.
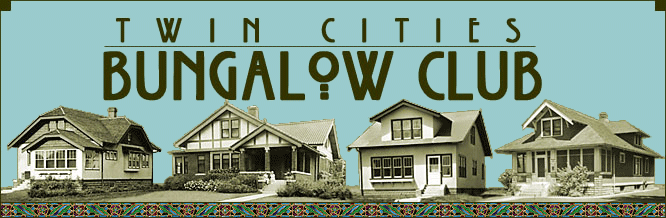
From a distance, the wrought iron railing on our back steps looked pretty good—at least nothing that a coat of paint couldn’t cure (photos 1a–c). But up close, it had a sizeable wobble that made it feel unsafe. A close inspection made it clear that years of rain and snow had created rust that had nearly eaten through the railing’s feet. Or more accurately, years of deferred maintenance had allowed rust to get a start.
Photos 1a-c
Fixing the railing seemed like a big job, but after talking it over with Bill Blood, a.k.a. This Old Handyman and Bungalow Club member, it seemed easier—especially since he would be doing the work.
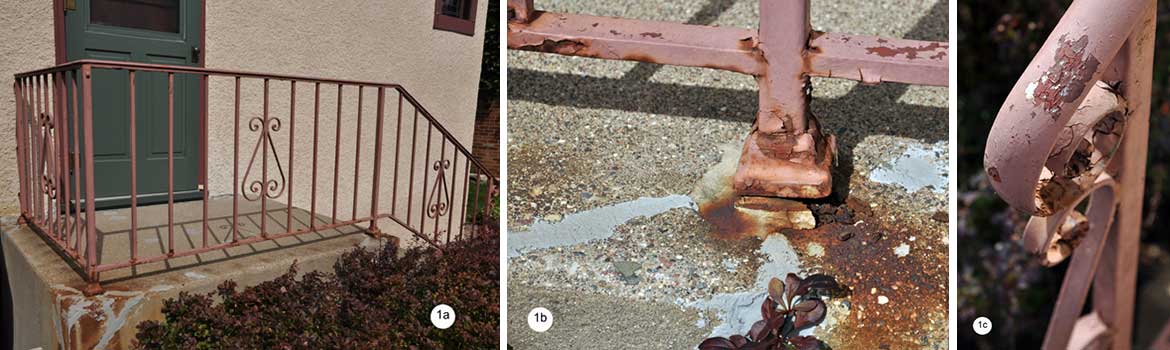
The first step was to cut the railing apart. The bolts that held the two pieces together had long since rusted to the railing. Then Blood put a mark on each leg to establish a consistent length for the new legs that would be added (photos 2a–c).
Photos 2a-c
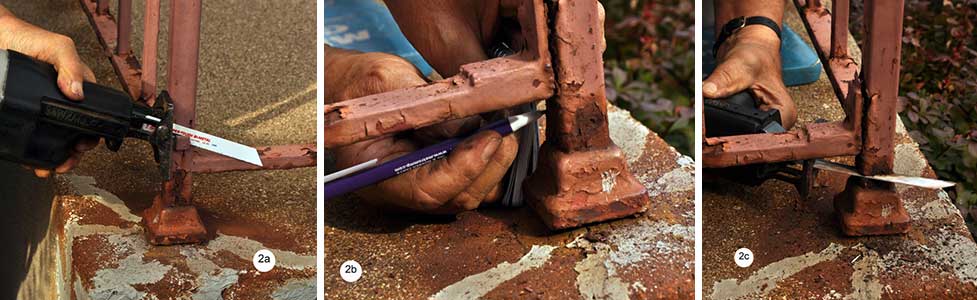
With the railing out of the way, Blood set to work removing the decorative caps that are meant to shield the base of each leg from water. Then using a hammer and chisel, as well as an electric drill and masonry bit, he removed the remainder of the old leg and sculpted a hole for each new leg (photos 3a–d).
Photos 3a-d
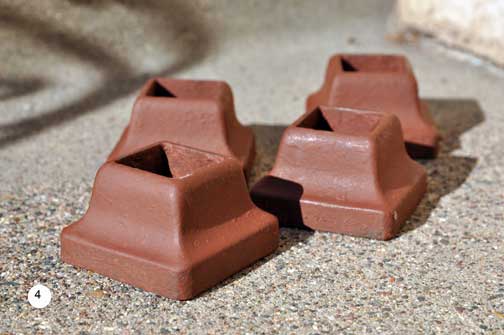
Photo 4
Meanwhile, the railing was off being sandblasted and getting new legs welded on. Blood applied a base coat of paint within a day or two after sandblasting to prevent rust from attacking the iron. It was great to see the railing come back in pristine condition—even the caps for the feet looked brand new (photo 4).
After widening a hole or two to get the new legs deep enough into the hole and making sure the railing was level, it was time to mix the rapid set cement and pour it into the holes around the legs (photos 5a–c).
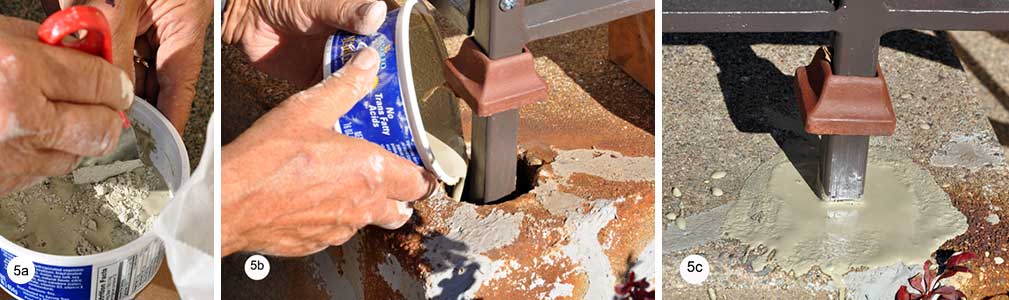
Photos 5a-c
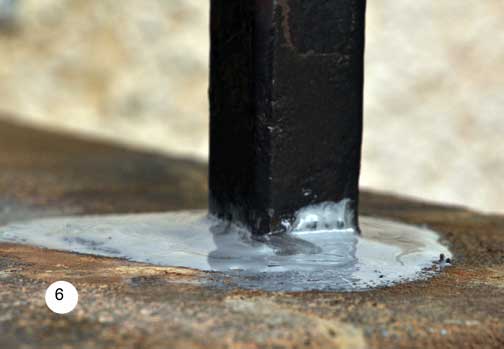
Photo 6
With the railing’s new legs set in concrete, it’s important to make the area around the legs “proud” so that water runs away from the legs. A further step is to caulk around the caps to further prevent water from reaching the base of the legs (photo 6).
After two more coats of paint, the railing looks new again and, more importantly, it is solid and safe (photos 7a–b).
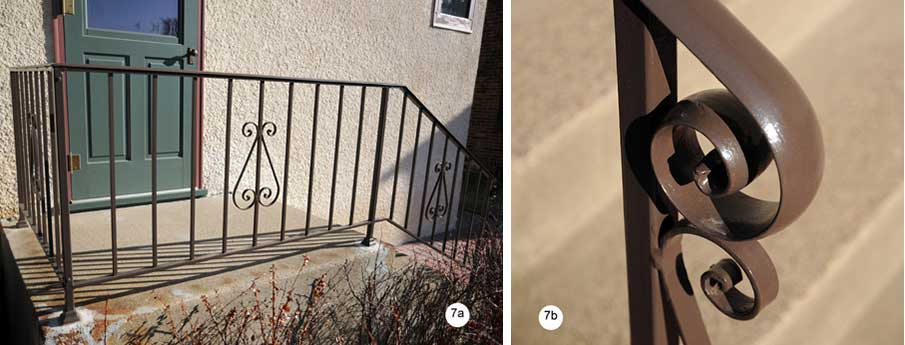
Photos 7a-b
Resources
Brighton Sandblasting and Painting
Blaine, Minn.
www.brightonsandblasting.com
Bauer Custom Welding, St. Paul
www.bauercustomwelding.com
Rapid Set Cement All
Used for anchoring railings in existing concrete steps.
A Second Project
A second—though less involved—railing project comes from Bungalow Club board member Deb McKinley.
In need of an outdoor stair railing for visits by my aging mother, I toured my Longfellow neighborhood to assess appropriate styles for my 1924 bungalow. I chose the common and simple pipe-style rail.
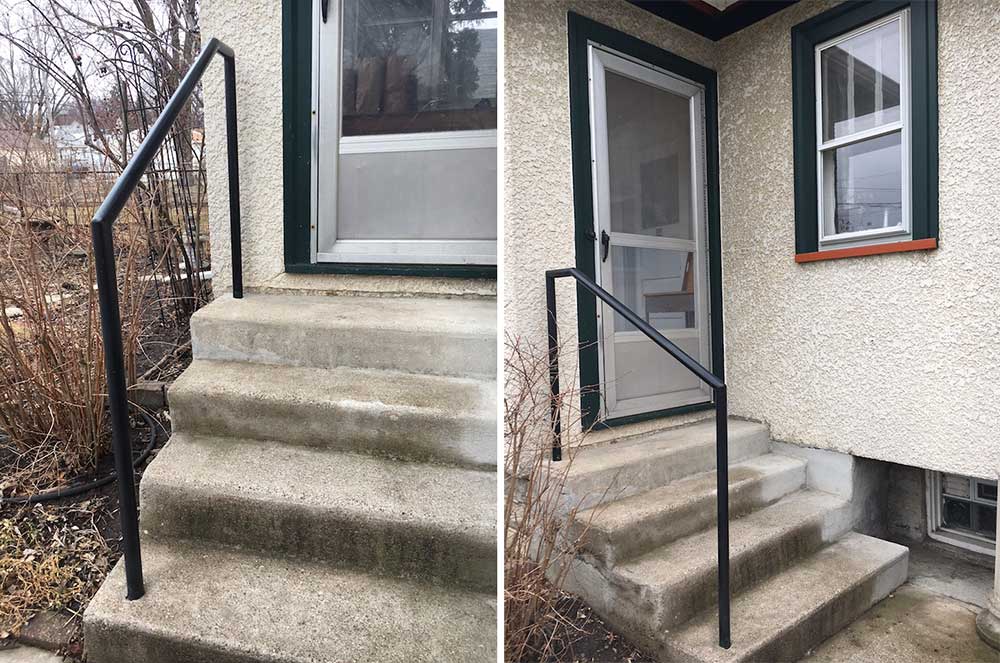
One friend recommended Accent Ornamental Iron & Powder Coating. Another friend who ran a powder coating line called the company (unasked by me) to verify the quality of their work by inquiring about their processes. He gave them a thumbs up. The railing was measured, built and installed for $295 in 2008.
Resource for McKinley’s Project
Accent Ornamental Iron Co.
www.accentornamentaliron.com
Click on Gallery link.