


Small Home Gazette, Winter 2017
Unhinged About Painted Door Hardware? Fire Up the Crock Pot
 My bungalow was constructed with thought and care. The homeowners that followed, however, didn’t always embrace the ethos used to build my home. Lack of attention to detail was splashed, or sometimes heavily painted, across my door hardware. The thought of their sloppiness was enough to unhinge me.
When a friend shared her recipe for stripping painted hardware, I borrowed her crafting crockpot and got cooking. Literally. I cooked my door hardware in her crockpot. No need for harsh chemicals or intense mechanical abrasion. Painted hardware only needs a long steam bath to break the paint bonds and allow for easy removal of both latex and oil-based paint.
Disassembly
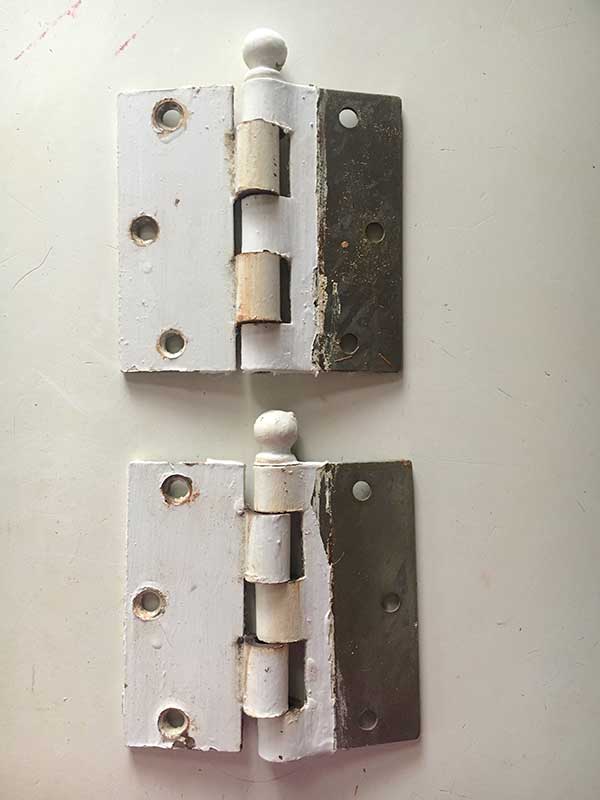
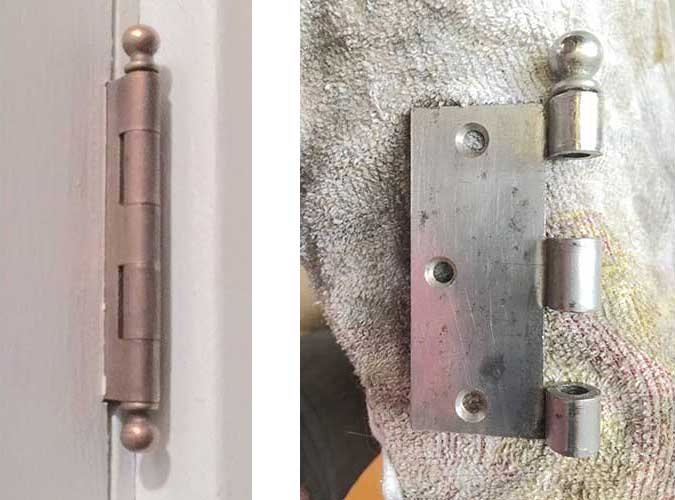
Our bungalow’s door and cabinet hardware had fallen victim to past sloppy paint jobs, which left us with an unsightly mish-mash of painted and unpainted metal.
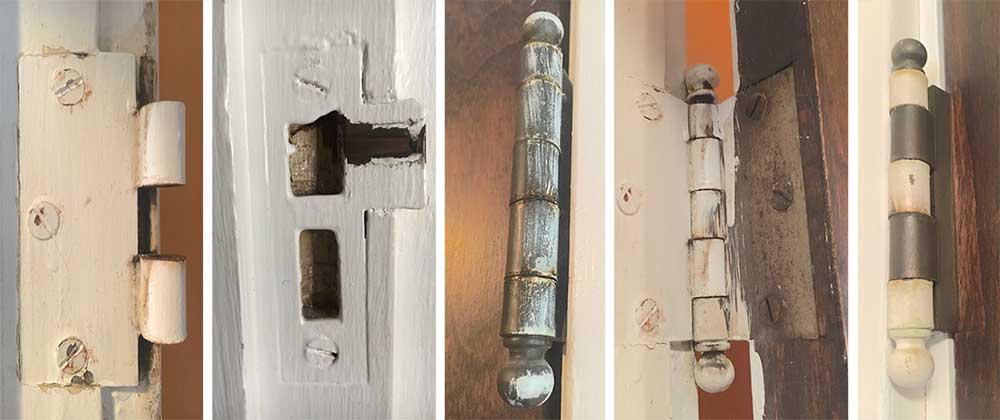
My husband Pete and I took seven doors out of their frames from two bedrooms, a bathroom and three closets, plus the hallway linen cupboard. I then unscrewed all the hinge plates and latch strike plates (lock receivers). Luckily, the escutcheon plates (doorknob backplates) had not been painted. I took photos along the way to help identify how the parts were supposed to go back on the doors. The door hinges were all the same size and thickness so I didn’t worry about exact locations. The bathroom door hardware was easy to identify—they were the only pieces plated in chrome.
Plates that were only lightly brushed with paint easily came out of their mortises (cut recesses). Those that were completely painted over required more care. I had to scratch paint out of screw heads. And, I traced each plate’s outline with an X-Acto knife to prevent the paint from cracking or peeling off the frame when the part was removed.
One of the hinge plates fit so snugly inside its mortise on the door that I couldn’t remove it. When I started to tap the hinge out with a screwdriver and hammer, the door’s wood edge started to split slightly. I stopped immediately, leaving the hinge on the door. There wasn’t much paint on it anyway. When working on my house I adhere to the adage “first do no harm,” a motto borne of regrettable actions during past projects, usually the result of applying just a little more force.
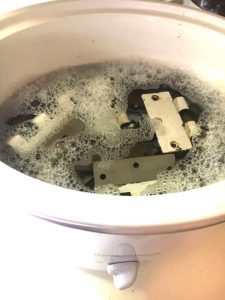 Crock Pot Bath
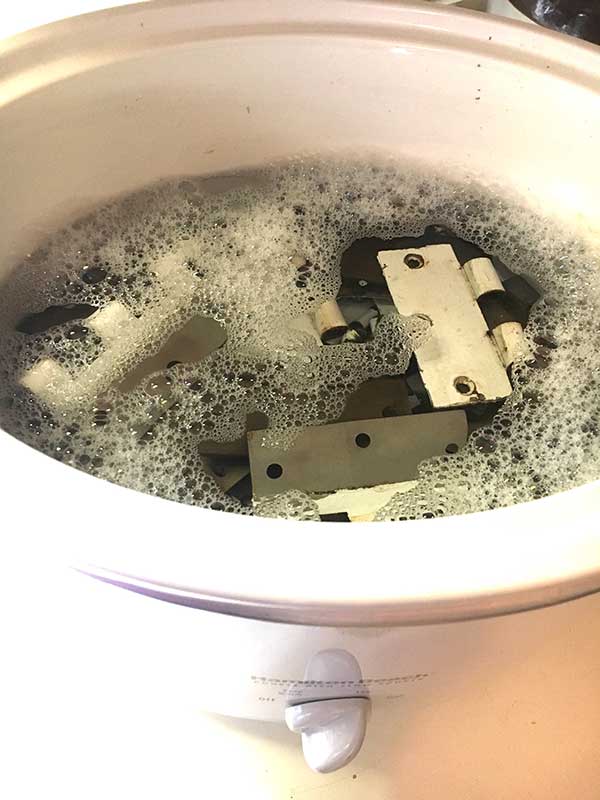
I put the complete batch of paint-marred pieces in the crockpot with a little laundry detergent to cook overnight (see recipe below). In the morning, Pete expressed concern about the odor in the kitchen. The smell, I explained, was just the hot laundry detergent. (Apparently he needs to spend more time washing clothes.)
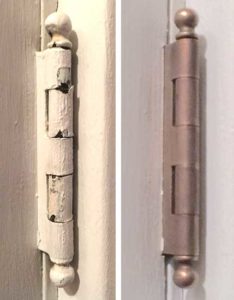
I was delighted at how easily the paint peeled off the warm hardware. When a residue remained, wiping with a dry towel typically did the trick. One or two pieces needed an additional light rub with fine steel wool to remove the last of the paint. Paint in crevices was excavated with a toothbrush or gently picked clean with an X-Acto blade. I finished up with a metal polish from the local hardware store to protect and shine the parts.
Left: A skin of paint, after it has been peeled from the hinge. Right: A dry towel removed final residue.
Reassembly

Our collection of cleaned and polished door and cabinet hardware, ready for reinstallation.
I reinstalled all of the pieces, securing 108 individual screws back into place. By the end of the weekend, I had a blister on my right thumb tip from applying pressure to the top of the manual screwdriver. An electric screwdriver might have made the job easier.
After rehanging the doors, Pete and I discovered that our hallway close door and one of the linen cupboard doors would not completely close. I found a video on This Old House magazine’s website (tinyurl.com/hxdmm8l) that shows a simple remedy using cardboard for shims.
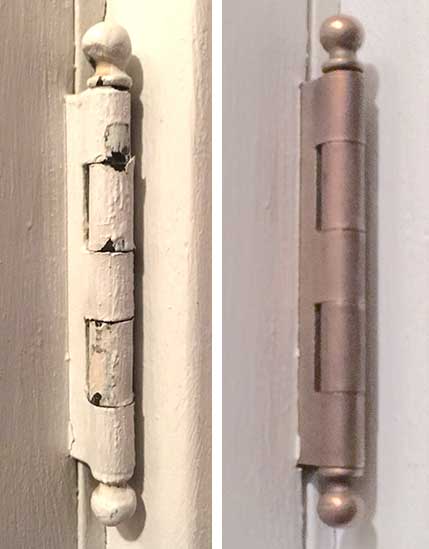
Although time consuming, the project was easy. No more paintbrush marks; zebra striping from alternating painted hinge knuckles; or chipping of heavy paint layers. The painted door hardware is gone and no longer leaves me unhinged.
Door Hardware Paint Stripping Recipe
Ingredients
- door hardware (hinges, lock receivers/latch strike plates, door knobs, escutcheon plates, screws)
- water
- ¼ – ½ cup liquid laundry detergent
- metal polish or beeswax furniture polish
Equipment
- crockpot or pot with lid (retired from food service)
- tongs
- terry cloth rag
- old toothbrush
- fine steel wool (00 or lower grade)
Steps
-
Place painted hardware in a crockpot or in a pot on the stovetop.
Before and after: The result of our project was a cleaner and classier look for our bungalow’s millwork.
- Cover hardware with 1–2 inches of water. Add laundry detergent and bring to a boil. Turn temperature to low and allow to slow cook approximately 8 hours. Test for paint separation by rubbing a part with tongs. When paint falls away, the pieces are ready.
- Cover your work surface with a rag. Work on one piece at a time. Paint will start to dry and re-adhere once removed from the steam bath. Use tongs to move one of the hot pieces onto the rag.
- Peel paint away from the piece. Use a terry cloth rag to rub off stubborn paint. If residue persists, use fine steel wool to gently abrade remaining paint. Clean paint out of crevasses with a toothbrush. Gently pick paint out of screw head recesses with the tip of the X-Acto knife blade.
- Dry pieces and wipe with metal polish. If pieces are not prone to rusting, this step can wait until all pieces are stripped.
- Repeat until all pieces are clean.
Resources
- For another recipe: “Before & After: Cleaning Vintage Metal Hardware”
tinyurl.com/azmtlb4
- “Answers to Your Toughest Bungalow Questions: door hardware maintenance,” Small Home Gazette, Winter 2014
tinyurl.com/zob9pd3
- “How to Paint a Door (Without Taking It Off Its Hinges)”
tinyurl.com/hahkgz5
- “Little Painting Trick Using Vaseline”
tinyurl.com/hpj3ygm