


Small Home Gazette, Winter 2020
Getting to the Bottom of Basement Repair
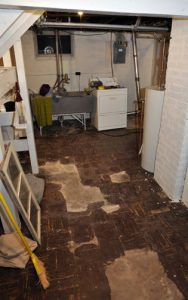
Missing and crumbling tiles made for an unsightly and unsafe floor.
After years of watching their basement floor tiles slowly disintegrate, our next door neighbors—Jim and Karen—were fed up. Most of the tiles had some degree of crumbling in progress and some were totally gone, revealing the concrete slab. Years of rain-driven minor flooding and water vapor coming up through the concrete had weakened the glue and the tiles themselves.
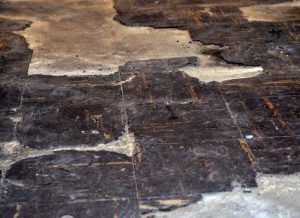
Years of water damage contributed to the erosion of the tiles.
Only five years older than our bungalow, their Foursquare featured the same asbestos-containing tiles that are in our basement. These tiles (theirs were speckled black and brown), were a popular choice from the 1920s through the 1960s because they were thin, strong, and fairly good at insulating against the cold concrete basement floor. While they contain asbestos, it is a relatively minor amount compared to other building materials of the era, and only a problem if the fibers become airborne or if someone eats pieces of the tile.
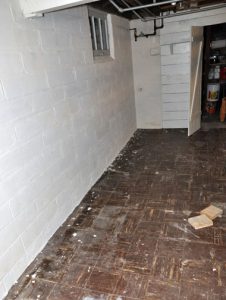
Applying water proofing paint to the block walls was a priority for the homeowners.
The prospect of removing nearly everything from their basement kept Jim and Karen from tackling this project until 2019. With both of them fully retired from work, they finally had the time to clean out the basement. A bonus project was to clean and paint the block walls with a masonry waterproof paint.
“We watched the problem worsen for years and decided that if we were going to go through the pain of emptying the basement, we wanted to tackle both the floor and the walls,” Jim says. “We wanted to do it well, but figuring out the best approach and sorting through the bids proved to be a challenge.”
So Many Options
There are many more options available today for basement floors than 100 years ago. From ceramic tiles to carpet to sheet vinyl to real and engineered wood, it can be difficult to choose. Aside from price, there are a few other factors to consider. Jim and Karen found a flooring consultant who helped them navigate the possibilities. Advice from Eric Fischbach at Hamernick’s Interior Solutions in St. Paul proved invaluable.
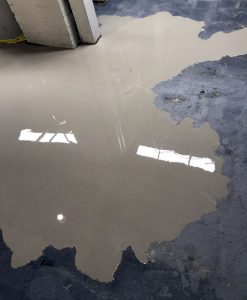
Coats of self-leveling cement spread across the concrete slab to create a flatter surface for the new floor.
How much water will be on the basement floor? “Minor water vapor isn’t much of a problem,” Fischbach says. “Modern glues and flooring products can stand up better.” He recommends doing a moisture test in several places on the concrete slab to better understand the situation—something that any reputable flooring contractor would perform. Fischbach says that in wetter basements, man-made flooring such as ceramic tile might be the better choice. And you might want to purchase extra pieces with the assumption that replacements will be needed.
How level is your basement floor? “The flooring that clicks together requires a fairly level floor,” Fischbach points out. “Older basement floors are notoriously wavy.” Self-leveling cement—a type of polymer-enhanced cement that contains less water and spreads like pancake batter—as well as plastic leveling clips can handle minor differences in height.

Laying the vinyl strips went pretty quickly for installer Paul Schulz, thanks to careful attention to preparing the floor surface.
With Fischbach’s guidance, Jim and Karen chose a vinyl tile applied with glue after their floor was smoothed out with several applications of self-leveling cement. Demolition of the old tiles, and cleaning and leveling the floor required many more hours of labor compared to putting down the new floor. Jim and Karen also put in time cleaning and applying water-proofing paint to the walls after hiring someone to fill minor wall cracks.
Unexpected Problems
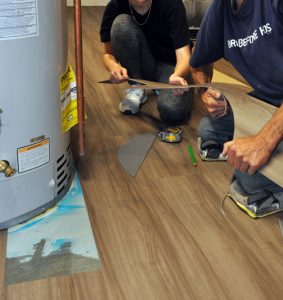
The vinyl flooring is trimmed to fit tightly around the basement’s too-heavy-to-move and permanent features.
One home improvement project often leads to another, and such was the case for Jim and Karen. Near the end of the process—as the floor installation approached the home’s primary plumbing vent stack, the installers noticed corrosion on the steel pipe as it entered the floor. That portion of the pipe had to be replaced, which required jack-hammering up the floor surrounding the pipe and pouring concrete around the new section of pipe.
“There’s no way to prepare for something like that,” Jim says, “but it really set us back—not only in the cost but also the extra days before we could move back into our basement.”
Save Your Basement Tiles?
If you have asbestos tiles in your basement and want to avoid this process, Eric Fischbach from Hamernick’s Interior Solutions in St. Paul recommends consistent maintenance.
“If you don’t have a lot of water seeping up through the floor and your basement hardly ever floods, you might be able to preserve the surface of your asbestos tiles,” he says.
The first step is to strip off any old wax. Then buff and wax the floor—applying three to four coats. Applying an additional coat of wax every few years will help keep the tiles from cracking. Fischbach recommends paying for better quality wax to get the best results.
Resource
Hamernick’s Interior Solutions
Eric Fischbach
1381 N. Rice Street, St. Paul
651-487-3211
ericf@hamernicks.com
www.hamernicks.com